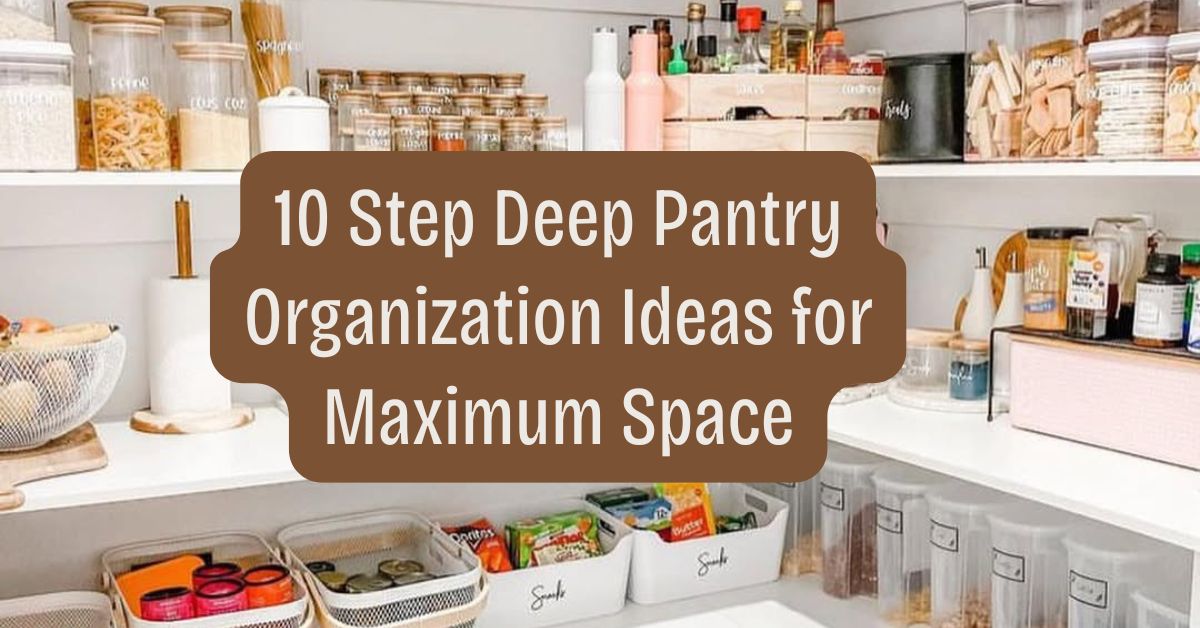
A deep pantry can be a dream come true—until it turns into a cluttered black hole of forgotten ingredients and expired food. The extra storage is undeniably valuable, especially for families, bulk shoppers, or passionate home cooks. But without a clear strategy, deep shelves can become more of a problem than a perk.
This guide will walk you through step-by-step, expert-approved deep pantry organization ideas that go beyond the basics. You’ll discover actionable tips, clever storage hacks, and layout strategies to maximize visibility, prevent food waste, and streamline your kitchen workflow.
Contents
- 1 What Is a Deep Pantry?
- 2 Why Strategic Pantry Organization Matters
- 3 Essential Pantry Organization Principles
- 4 Step 1: Plan and Measure
- 5 Step 2: Invest in the Right Storage Solutions
- 6 Step 3: Implement a Custom Zoning System
- 7 Step 4: Maximize Vertical & Door Space
- 8 Step 5: Label and Categorize for Effortless Maintenance
- 9 Step 6: Keep Inventory in Check
- 10 Step 7: Incorporate Time-Saving Habits
- 11 Step 8: Organize by Meal Type or Cooking Routine
- 12 Step 9: Organize for Kids and Family Access
- 13 Step 10: Seasonal and Backup Storage
- 14 Common Mistakes to Avoid in Deep Pantry Organization
- 15 Final Summary: Your Deep Pantry—Finally Under Control
What Is a Deep Pantry?
A deep pantry typically refers to shelving units that extend more than 16 inches in depth—sometimes up to 24 or even 30 inches. While they offer ample space, the challenge lies in accessing items at the back without pulling everything in front.
Common Issues with Deep Pantries:
- Items get lost in the back
- Duplicate purchases
- Food expires unnoticed
- Wasted vertical space
- Difficult to clean and maintain
Why Strategic Pantry Organization Matters
An organized pantry isn’t just visually satisfying—it saves money, time, and stress. According to the USDA, the average American household wastes over 30% of the food they purchase. A significant portion of this is due to poor storage and visibility.
Benefits of Deep Pantry Organization:
- Reduces food waste
- Avoids overbuying
- Improves kitchen efficiency
- Keeps inventory clear and visible
- Makes meal prep and grocery planning easier
Essential Pantry Organization Principles
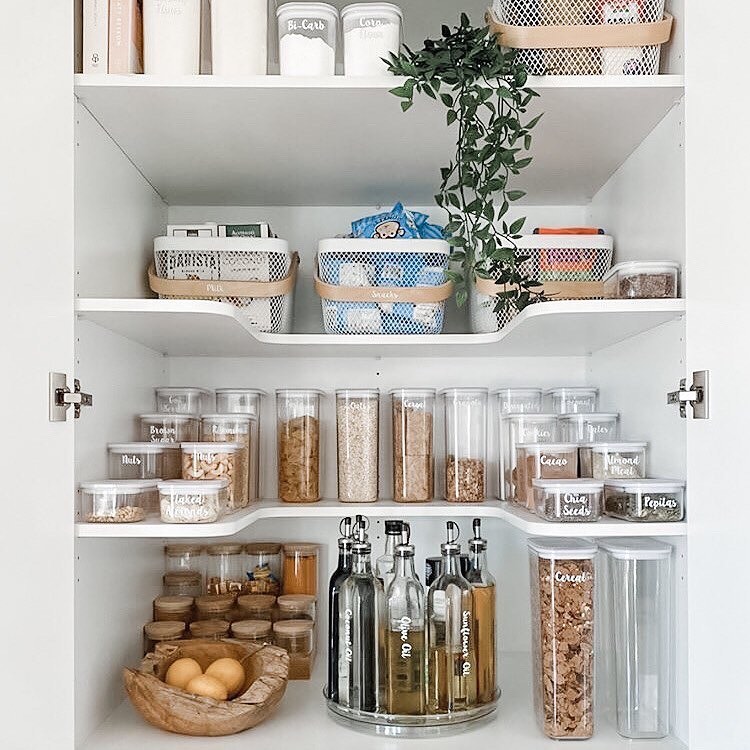
Photo Credit: @projectsort
Before diving into storage solutions, it’s important to understand a few core concepts that will influence how you set up your pantry.
Zone-Based Storage
Divide the pantry into usage categories—baking, breakfast, snacks, canned goods, spices, etc. Each shelf or bin becomes a dedicated zone.
First In, First Out (FIFO)
Just like grocery stores, place the oldest items in the front and the newest in the back to minimize spoilage.
High Visibility
Opt for clear or open containers, labels, and tiered setups so nothing gets hidden behind another item.
Adapt to Frequency of Use
Store everyday essentials at eye level and specialty or seasonal items up high or in the back.
Step 1: Plan and Measure
Before you buy a single container, take time to plan your layout. Every shelf and product matters.
What You Need to Do:
- Empty your pantry completely for a fresh start.
- Measure the depth, width, and height of each shelf.
- Note where electrical outlets or awkward corners might limit certain types of containers or drawers.
- Create a simple sketch or layout to help plan zones effectively.
Pro Tip: Use painter’s tape to outline container sizes before purchasing.
Step 2: Invest in the Right Storage Solutions

Photo Credit: @alexhodgsonrealestate
Once you’ve measured and mapped your pantry, it’s time to select containers and accessories that work with the depth—not against it.
Clear Deep Bins

Why they work: They act like drawers—pull one out, and you can access everything inside without reaching far back.
- Choose bins with handles for easy sliding
- Opt for low-profile bins on upper shelves to prevent heavy lifting
- Use stackable varieties for snacks, pasta, or granola bars
Baskets for Bulk Storage

Great for: Potatoes, onions, bulk snack packs, or overflow stock.
- Use breathable baskets (wire or woven) for produce
- Store larger backups of frequently used items (extra cereal boxes, rice, etc.)
Turntables (Lazy Susans)

Ideal for: Oils, sauces, nut butters, or jars with similar heights.
- Use 12- to 16-inch diameters for deeper shelves
- Choose a raised edge or dual-level turntable to prevent spills
- Group by category—e.g., “condiments” or “Asian sauces”
Shelf Risers

Use these when items are similar in size, like canned goods or small jars.
- Try expandable 3-tier risers to fully utilize shelf width
- Always group by category and face labels forward for easy scanning
Pull-Out Drawers or Sliding Shelves

These are the gold standard for deep pantry organization but require installation.
- Use bottom drawers for heavy or large items (rice bags, drinks)
- Consider drawer inserts for sorting small items inside pull-outs
- Great ROI in terms of access and long-term usability
Step 3: Implement a Custom Zoning System
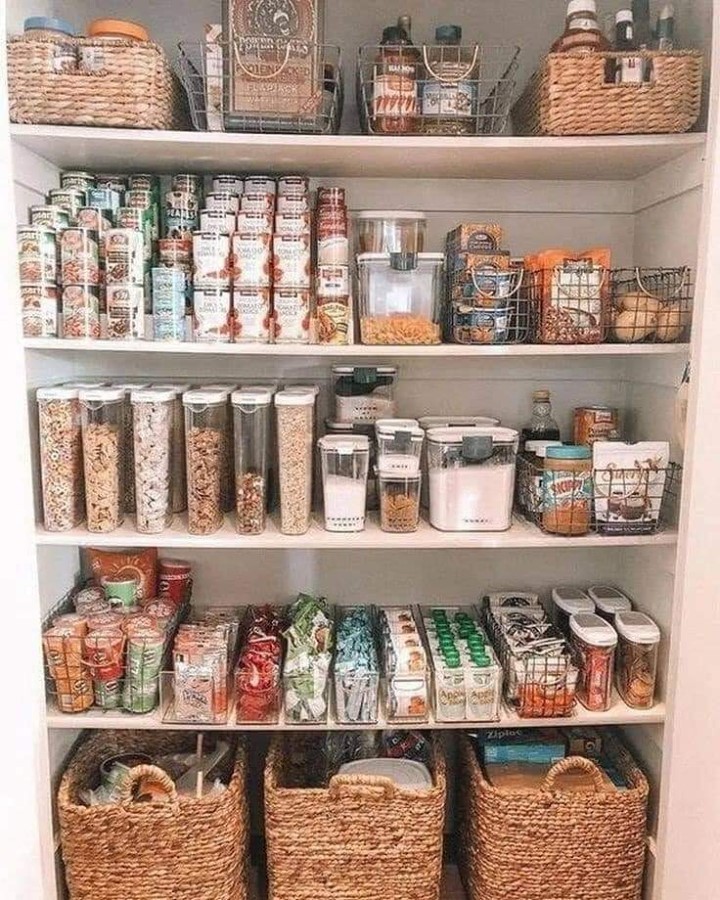
Photo Credit: @totchouston
Now that your tools are in place, it’s time to decide what goes where.
Common Pantry Zones:
| Zone | Contents | Ideal Placement |
| Snacks | Chips, granola bars, trail mix | Middle/lower shelves (kid-level) |
| Baking | Flour, sugar, chocolate chips, baking soda | Mid-shelf, near prep zone |
| Canned Goods | Soups, beans, tomatoes | Lower eye level, risers or bins |
| Breakfast | Cereal, oatmeal, spreads | Eye level for adults |
| Spices & Condiments | Oils, sauces, vinegars, spice jars | Lazy Susans, upper shelves |
| Bulk Items | Extra paper towels, rice bags, backup supplies | Bottom shelves or baskets |
| Rarely Used | Seasonal baking tools, holiday-specific items | Top or deep back shelves |
Tip: Always align zones with how you cook and your household’s eating habits.
Step 4: Maximize Vertical & Door Space

Photo Credit: @sunnyspacesorganizing
Deep pantries often have underused vertical and door areas. Don’t let that space go to waste.
Add Extra Shelving
- Use shelf dividers or add freestanding shelves inside tall spaces
- Helps separate snack bins, baking ingredients, or pasta varieties

Over-the-Door Organizers
Perfect for:
- Spice packets
- Instant oatmeal
- Small condiments
- Tea bags and drink mixes
Choose adjustable or clear-pocket designs to keep visibility high.

Undershelf Baskets
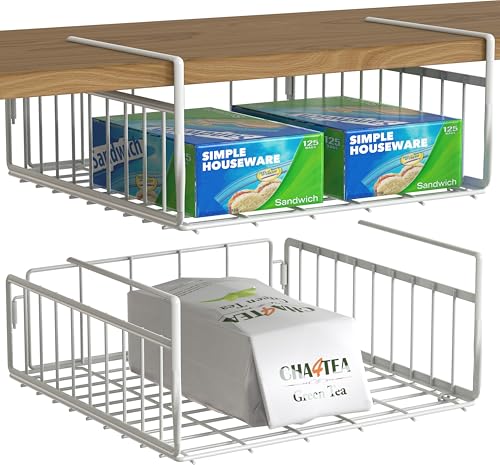
Slide these onto an existing shelf for bonus space underneath.
- Best for lightweight items: napkins, seasoning packets, small jars
- Ensure the shelf can support the basket’s weight before filling
Step 5: Label and Categorize for Effortless Maintenance
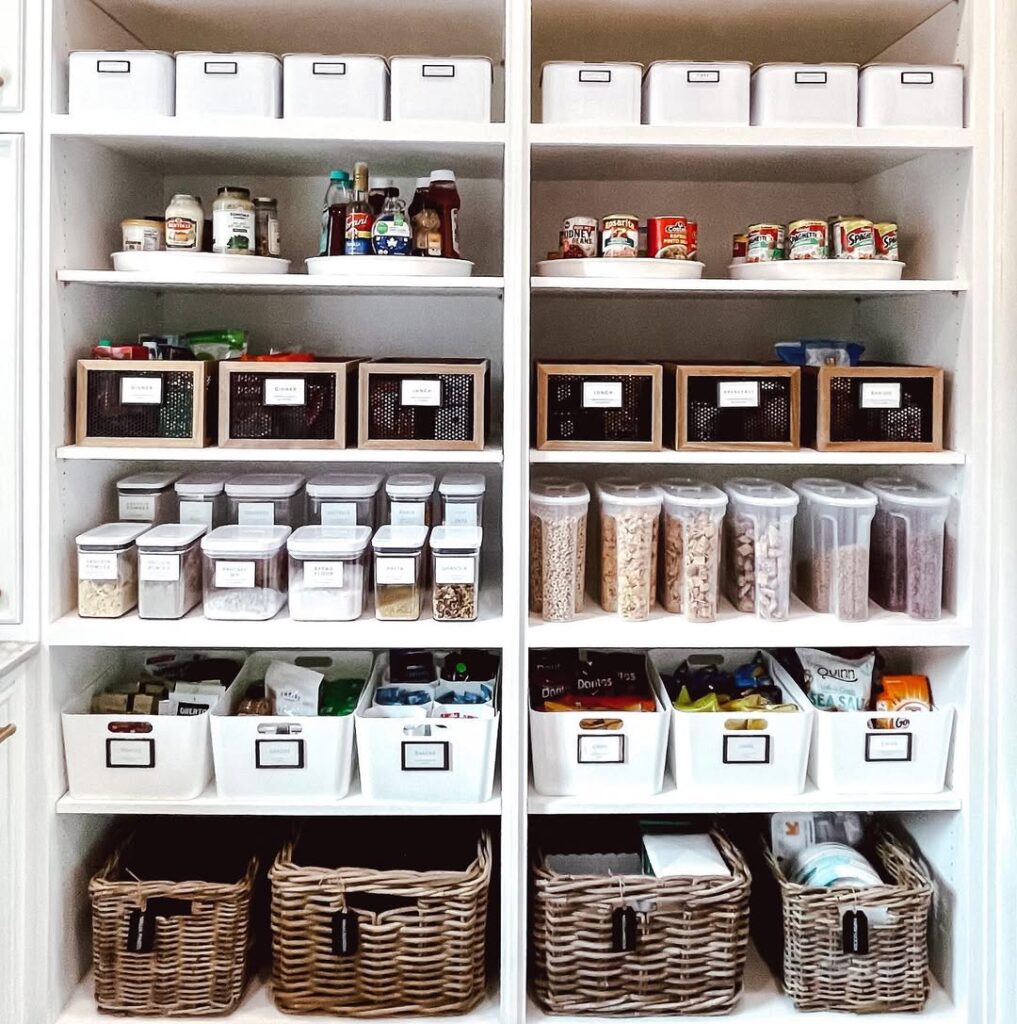
Photo Credit: @azhouseoforder
Labeling may seem like a decorative touch, but it’s actually one of the most powerful tools for keeping a deep pantry functional. It makes items easier to locate, reminds you of your zoning system, and encourages everyone in your household to put things back where they belong.
Labeling Guidelines:
- Use broad category labels (e.g., “Baking,” “Snacks,” “Pasta”) to stay flexible
- For bins and drawers, place labels on the front-facing side
- Label both containers and shelves if zones shift often
- Consider chalkboard, dry-erase, or clip-on labels for easy updating
Pro Tip: If you’re using decanted containers (like for flour or cereal), include cooking instructions or expiration dates on the back of the label or bottom of the jar.
Categorization Hacks:
- Alphabetize spice jars or group by cuisine (e.g., “Mexican,” “Asian,” “Italian”)
- Use color-coded labels or containers for specific household members (great for kids!)
- Group “like with like,” not just in purpose but in shape and size for visual order
Step 6: Keep Inventory in Check
A deep pantry can tempt you to overstock, but excess leads to expiration. Instead, build a system that helps you track what you own and when it needs to be used.
Use an Inventory System:
There are three main options depending on your style:
1. Manual Pantry Inventory List
- Track what’s in each zone
- Include expiration dates and quantities
- Store the list on the inside of the pantry door or use a clipboard
2. Whiteboard Tracker
- Use a dry-erase board to note “Use First” or “Low Stock” items
- Quick to update; ideal for busy households

3. Digital Inventory Apps
Apps like Pantry Check, CozZo, or Sortly let you scan barcodes and track use-by dates on your phone.
| App Name | Key Feature | Ideal For |
| Pantry Check | Barcode scanner & cloud sync | Tech-savvy families |
| CozZo | Meal planning + inventory | Meal preppers |
| Sortly | Visual inventory & tags | Organizers with photos |
Tip: Sync digital tools with your grocery list to avoid repeat buys.
Step 7: Incorporate Time-Saving Habits
Organization isn’t a “set it and forget it” game—especially with a deep pantry. Maintenance routines are essential.
Establish Weekly Pantry Routines:
- Do a quick shelf scan before making your grocery list
- Move older items forward and rotate newer ones to the back
- Wipe down surfaces and bins to avoid crumbs or sticky spills
- Toss expired or stale items immediately
Monthly Deep Check:
- Revisit your zones—are they still working?
- Are certain areas constantly messy? Rethink bin sizes or placement.
- Take inventory of backup stock and adjust buying habits accordingly.
Step 8: Organize by Meal Type or Cooking Routine
Photo Credit: @becca_maree
This step is often overlooked—but organizing your pantry based on how you actually cook can save serious time during meal prep.
Group by Meal Occasion:
- Breakfast Zone: Oatmeal, cereal, nut butters, syrup, granola
- Lunch Zone: Soups, canned tuna, wraps, nuts, single-serve snacks
- Dinner Staples: Pasta, rice, sauces, beans, cooking oils
- Quick Meals: Pre-packaged mixes, boxed mac & cheese, heat-and-eat options
This layout reduces the decision fatigue of hunting for scattered ingredients.
Create Prep Stations:
Have a favorite routine like baking, smoothie-making, or taco night?
- Baking Station: Flours, sugars, cocoa, vanilla extract, sprinkles
- Smoothie Station: Protein powder, chia seeds, nut butters, dried fruit
- International Cuisine: Designate a bin for each—Mexican, Italian, Indian, etc.
Group all the essentials in one pull-out bin or container. When it’s time to cook, you simply grab the whole set.
Step 9: Organize for Kids and Family Access

Photo Credit: @elodie_rose_interiors
Pantries work better when everyone can use them with ease. Designing your deep pantry with family-friendly access reduces messes and builds independence in little ones.
Kid-Friendly Zones:
- Store grab-and-go snacks at lower levels in open bins
- Use clear containers so kids can see what’s inside without rummaging
- Label bins with images if children aren’t reading yet
Adult-Only Zones:
Reserve the higher or deeper back shelves for:
- Supplements
- Emergency food kits
- Rarely used specialty ingredients
- Treats you’d rather keep out of reach!
Bonus Idea: Use a small bin labeled “Eat This First” to guide kids or busy partners toward items nearing expiration.
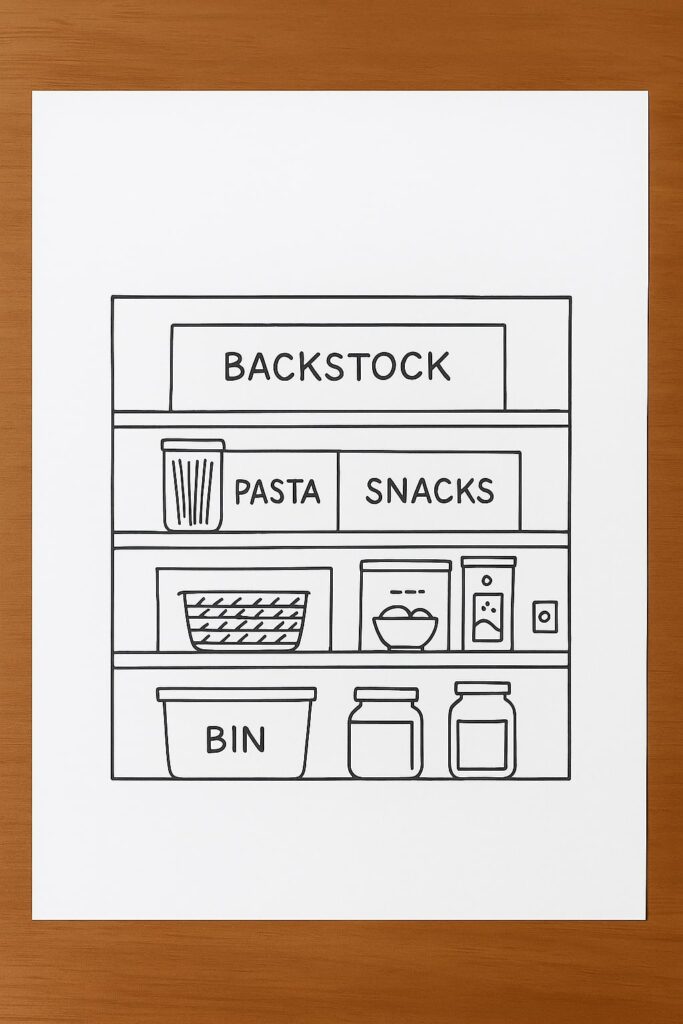
Step 10: Seasonal and Backup Storage

Photo Credit: @less.is.a.new.more
Deep pantries are great for overflow, but you still need a system. Don’t let backup stock become forgotten stock.
Smart Overflow Management:
- Designate a “Backstock” bin for extras like duplicate jars or boxed goods
- Rotate these items into your main zones during your monthly check-in
- Use the bottom shelf or deepest part of the pantry for seasonal items
| Category | Store Here When Not in Use |
| Holiday Baking | Top shelf, labeled clear bin |
| Picnic Supplies | Bottom shelf bin (e.g., paper plates, ketchup packets) |
| Party Snacks | Deep corner in stackable containers |
| Winter Soups | Tall bin near canned goods area |
Common Mistakes to Avoid in Deep Pantry Organization

Photo Credit: @rebeccaudallhome
To truly maximize your deep pantry, it helps to avoid common pitfalls that many households fall into.
Overfilling the Shelves
It’s tempting to fill every square inch, but overstocking leads to:
- Lost items behind clutter
- Duplicates you don’t need
- Food expiring before it’s ever seen
Solution: Always leave some buffer space in each zone for new items or shifting stock.
Using Containers Without Purpose
Buying cute bins isn’t the same as organizing.
Solution: First decide on your pantry layout and zones, then measure, and only then buy containers to fit those dimensions and needs.
Ignoring Expiration Dates
Old pasta, rancid oils, or expired canned goods can accumulate fast in deep spaces.
Solution: Use a First In, First Out method. Place older items in front. During monthly checks, toss what’s past its prime.
Not Labeling or Maintaining the System
Even the best-organized pantry won’t stay that way without upkeep.
Solution: Label everything, involve your household in restocking and maintenance, and set a routine (weekly and monthly).
Final Summary: Your Deep Pantry—Finally Under Control
A deep pantry doesn’t have to mean deep chaos. With a thoughtful layout, smart containers, clearly labeled zones, and a little regular maintenance, you can turn even the most cavernous pantry into a well-oiled food storage machine.
Quick Action Plan
- Measure before you organize
- Choose bins, drawers, and risers that match your pantry’s depth
- Group by zones, meal types, or household member
- Label, track, and rotate regularly
- Adjust seasonally and make it work for the way you live and cook
By filling in every gap your competitors missed—from family access tips to meal-based organization and inventory management—you now have a comprehensive pantry organization system that’s functional, flexible, and foolproof.
Your pantry should support your lifestyle—not slow it down.