Utility closets are often the most overlooked and underutilized spaces in a home. They’re intended to house your cleaning supplies, tools, and backup household items—but more often than not, they end up messy, inefficient, and difficult to navigate. This guide goes beyond surface-level tips and dives into everything you need to know about transforming your utility closet into a streamlined, space-maximizing hub of order.
What Is a Utility Closet?
A utility closet, also called a cleaning closet or maintenance closet, is a small storage area used to store household tools, cleaning products, and sometimes utility meters or HVAC components. They’re commonly located in hallways, mudrooms, basements, or near the laundry area.
Common Items Stored in Utility Closets
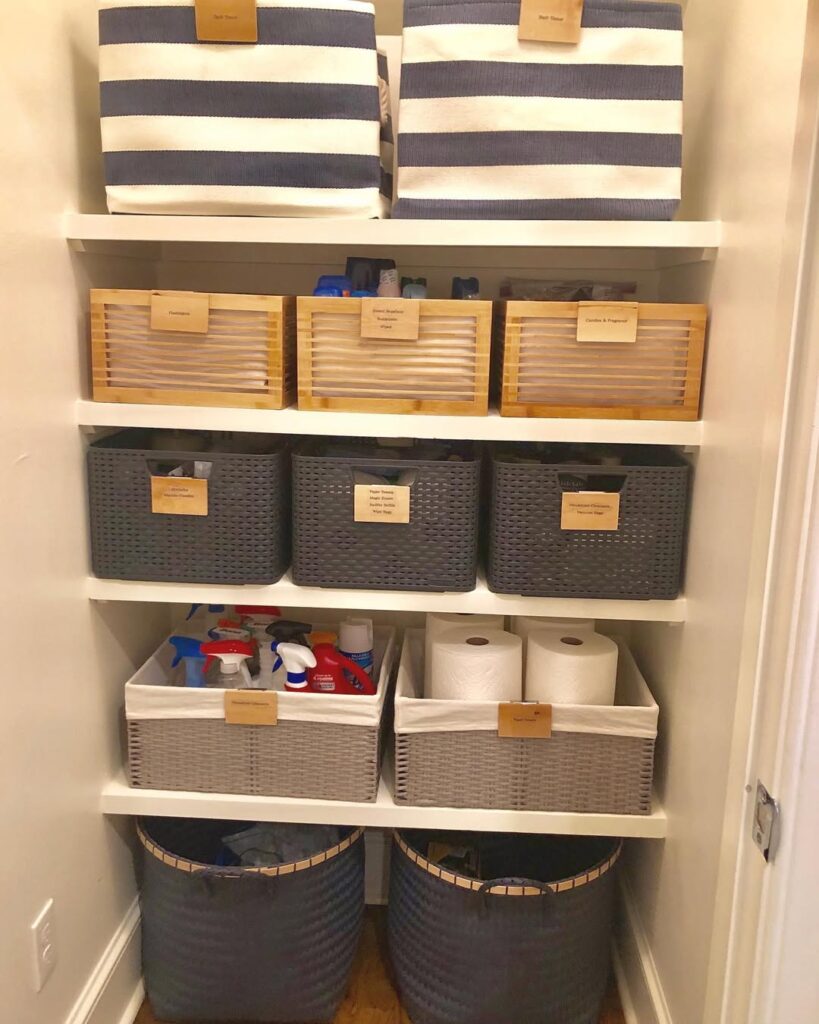
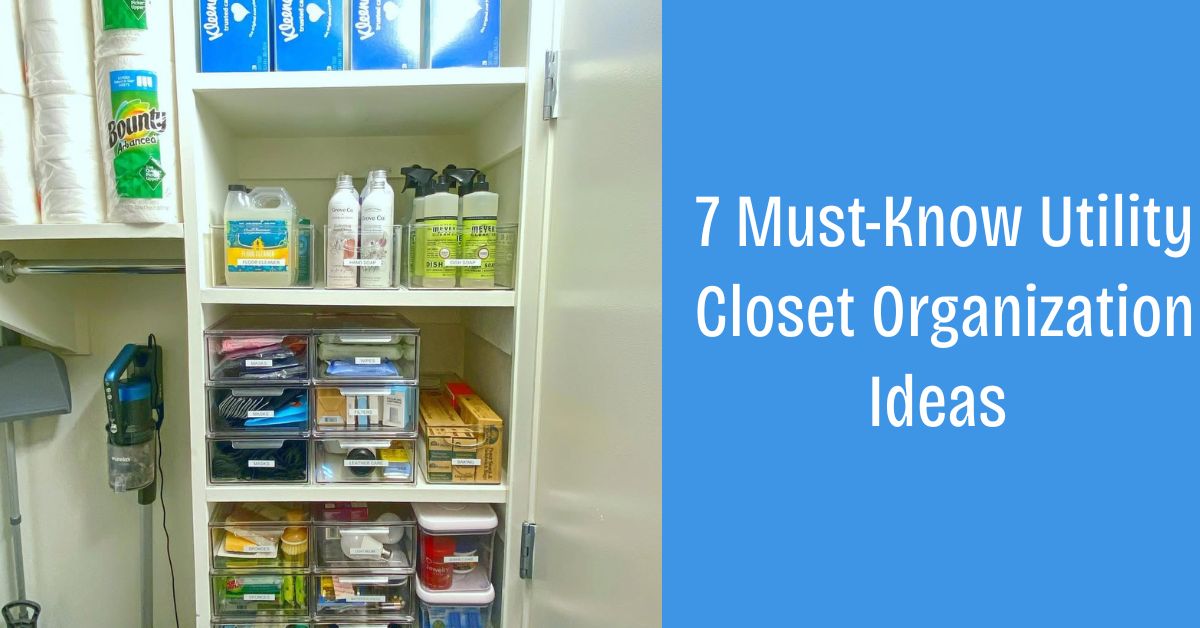
Photo Credit: @littlerockpaperscissors
Before organizing, it helps to know what typically belongs in a utility closet:
- Cleaning supplies: Sprays, sponges, microfiber cloths, mops
- Long-handled tools: Brooms, dusters, vacuum
- Home maintenance: Light bulbs, batteries, extension cords
- DIY tools: Screwdrivers, hammers, nails
- Paper products: Extra paper towels, toilet paper
- Seasonal items: Infrequently used gear like winter boots or fans
- Emergency supplies: Flashlights, candles, first-aid kits
Contents
- 1 Step 1: Audit and Declutter Before You Organize
- 2 Step 2: Measure and Map Out Your Space
- 3 Step 3: Smart Storage Solutions for Every Utility Closet
- 4 Step 4: Organize by Zones, Not Just Products
- 5 Step 5: Prioritize Safety, Accessibility & Sustainability
- 6 Step 6: Maintenance & Long-Term Upkeep
- 7 Step 7: Add Finishing Touches for Style and Functionality
Step 1: Audit and Declutter Before You Organize
Before buying anything or mounting a hook, take stock of what’s actually in your utility closet. This process will immediately free up space and allow you to organize more intentionally.
Decluttering Steps:
- Empty the Closet Completely
Lay everything out and assess the space. - Group Similar Items
Cleaning products together, tools together, etc. - Purge Unused or Duplicate Items
Safely dispose of expired chemicals, empty bottles, or tools you haven’t used in years. - Clean the Space Thoroughly
Wipe down shelves, sweep the floor, and disinfect any sticky surfaces.
Inventory Template Table
| Item Category | Quantity | Keep/Donate/Trash | Storage Priority (High/Low) |
| Glass Cleaners | 3 | Keep | High |
| Extra Light Bulbs | 12 | Keep | Medium |
| Rusty Tool Set | 1 | Trash | Low |
| Paint Cans (Partial) | 4 | Donate | Low |
Use a sheet like this to log your items before reorganizing.
Step 2: Measure and Map Out Your Space
Instead of blindly buying containers and hoping they’ll fit, take exact measurements of your utility closet:
- Height, width, and depth
- Interior door width (for over-the-door organizers)
- Shelf spacing (if any exist)
- Available wall space for vertical storage
Sketch a quick layout or use a free app to draft a digital plan. Knowing your dimensions ahead of time will ensure everything you buy or DIY fits like a glove.
Closet Layout Types & Tips
| Closet Type | Common Features | Best Use of Space |
| Tall & Narrow | Broom closets, hallway storage | Use vertical wall-mounted racks |
| Deep Utility Nooks | Basement closets, pantry-like spaces | Pull-out bins, lazy susans, deeper shelves |
| Multipurpose (Laundry) | Often combined with linen or laundry room | Use door space, add stackable storage |
| Low Clearance Cabinets | Under stairs, crawlspace-type closets | Sliding drawers, labeled crates |
Step 3: Smart Storage Solutions for Every Utility Closet
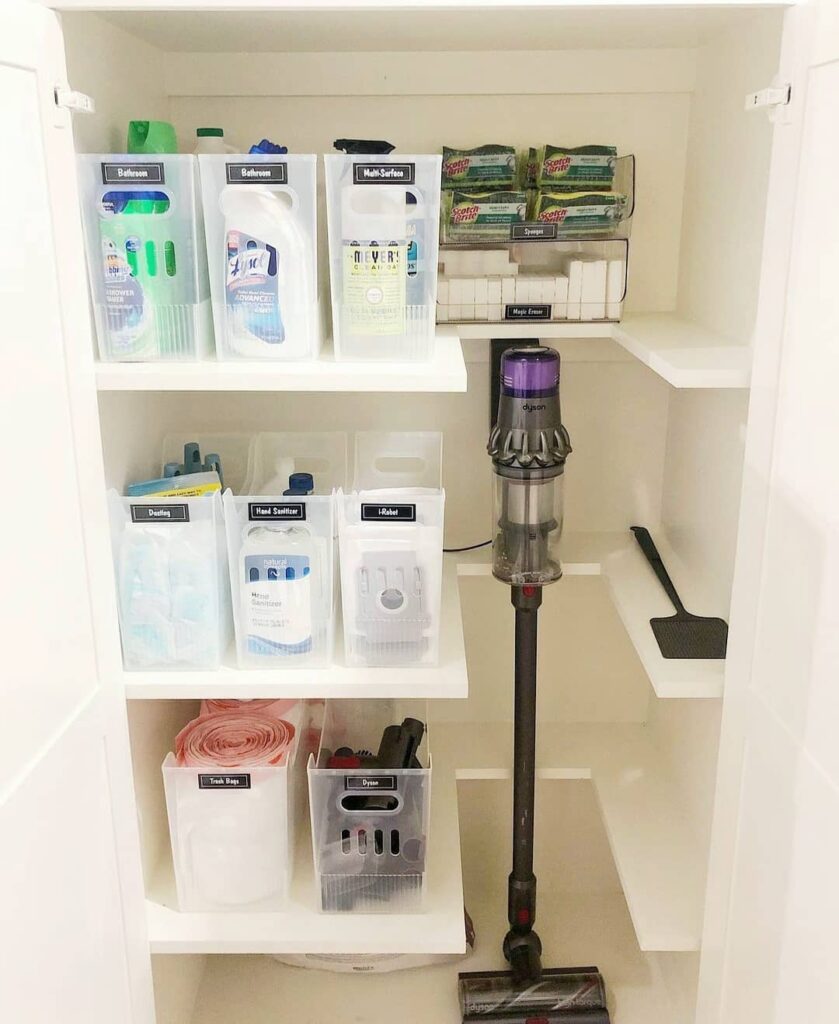
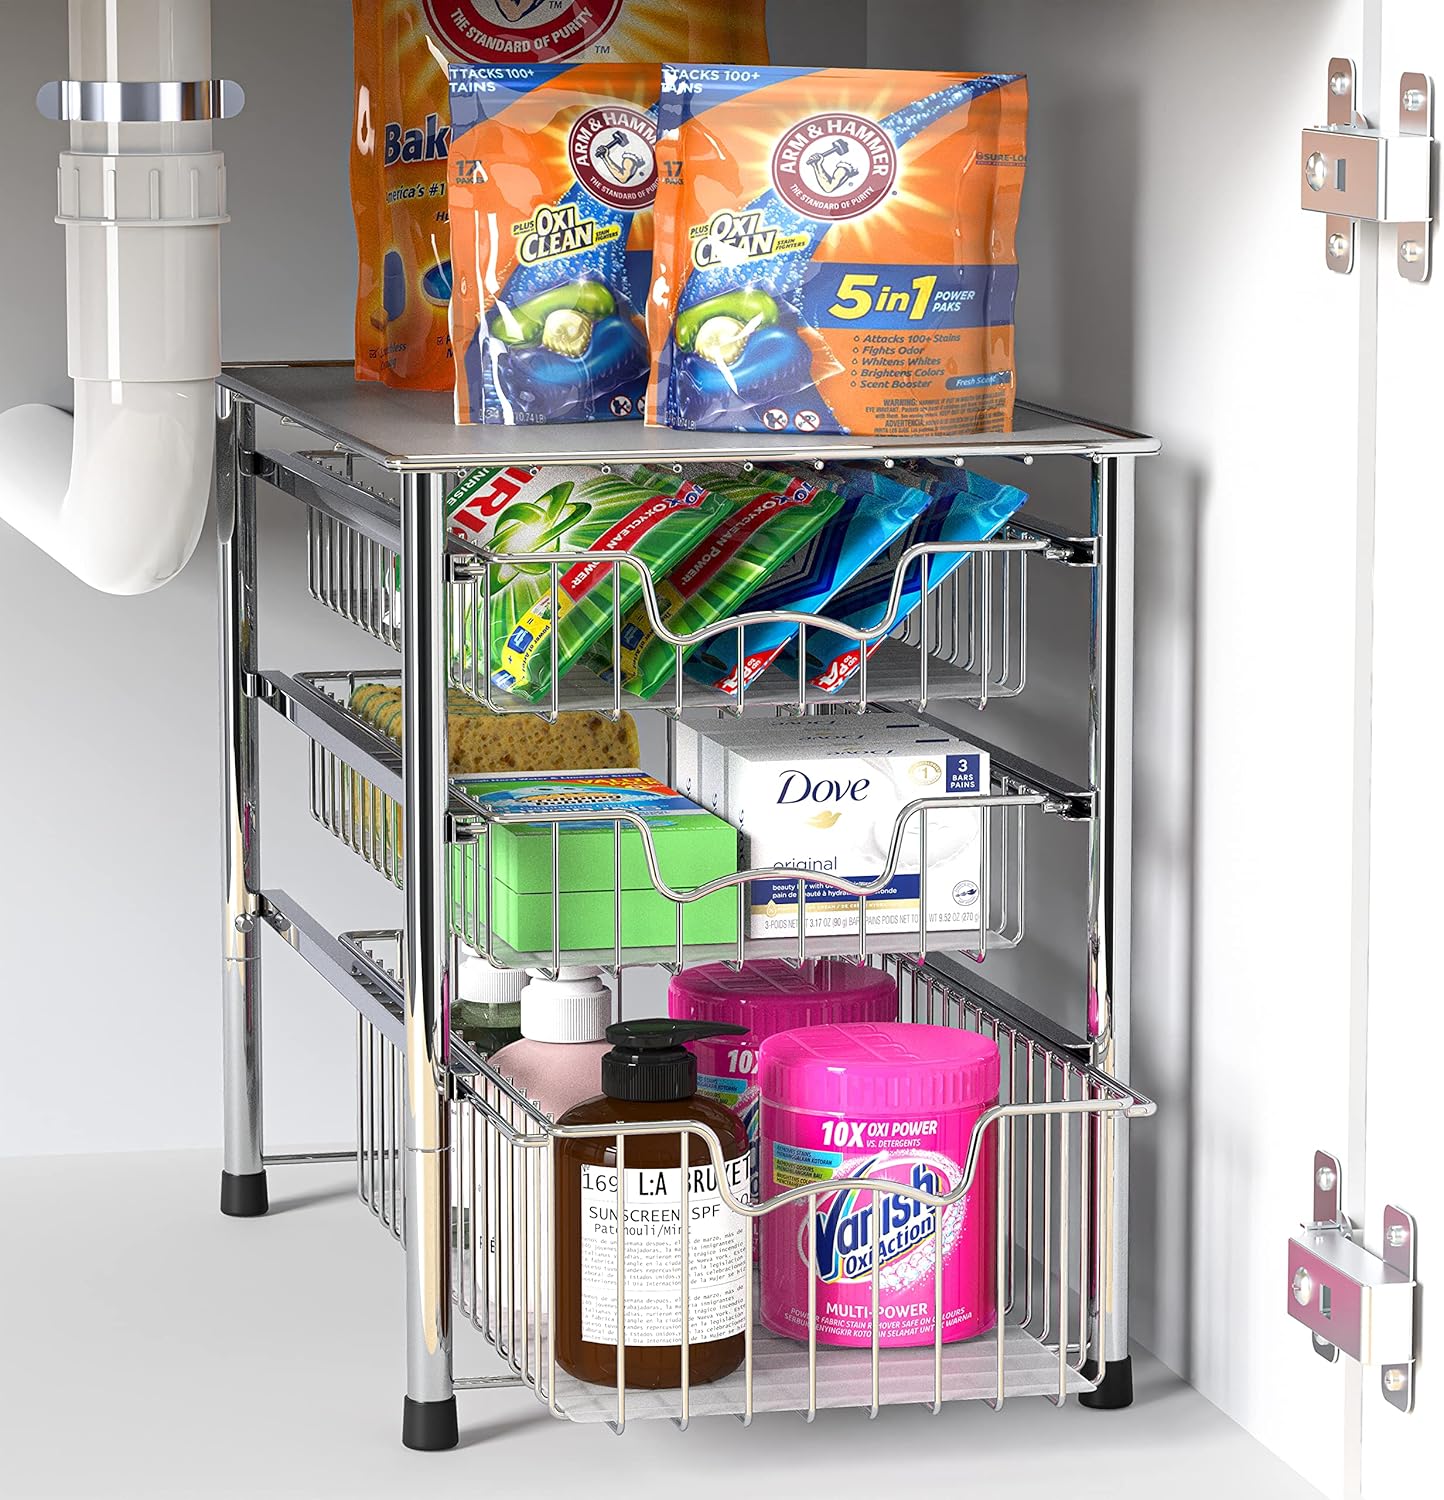
Photo Credit: @bestoforganizing
Once you’ve cleared the clutter and mapped your layout, it’s time to bring in storage solutions tailored to your space and your stuff. The goal here is to maximize vertical space, reduce floor clutter, and make everything easily accessible.
Wall & Door Storage Ideas
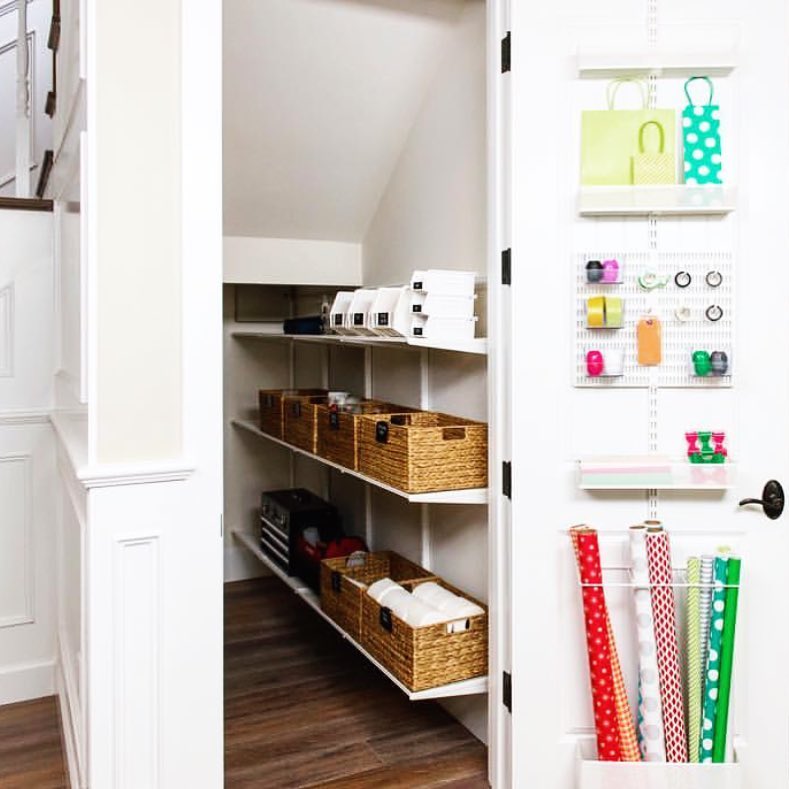
Photo Credit: @organized_simplicity
Use your walls and doors to get bulky or frequently-used items off the floor:
- Pegboards: Perfect for tools, cleaning brushes, and even cords. Customize the hook layout to fit your needs.
- Wall-mounted broom holders: These can hang mops, brooms, dusters, and even small vacuums.
- Over-the-door organizers: Great for spray bottles, dust cloths, and gloves. Clear-pocket versions let you see everything at a glance.
- Magnetic strips or hooks: Ideal for hanging scissors, small tools, or metal scrapers.
Shelf Storage & Stackables
If your closet has built-in shelves—or if you install some—take advantage of height by layering items with:
- Clear stackable bins: These are ideal for sorting cleaning categories (glass, bathroom, floors) or supplies (light bulbs, batteries).
- Pull-out baskets: Wire or mesh bins are great for deep shelves so you don’t lose small items in the back.
- Shelf risers: Use them to double the usable space on each shelf, especially for short items like sprays or sponges.
Floor Space Organization
It’s tempting to toss bulky items on the floor, but that creates chaos. Instead:
- Add rolling carts: Narrow carts can slide in and out easily for tools or paper products.
- Use heavy-duty bins: Store backup supplies or seasonal items at the bottom.
- Consider tiered baskets: They’re perfect for holding rags, brushes, or overflow items without turning into a pile.

Small Closet Hacks for Tight Spaces
| Challenge | Smart Solution |
| Narrow vertical space | Install tension rods to hang spray bottles |
| No built-in shelving | Use a tall over-the-toilet-style freestanding rack |
| Awkward corners | Use turntables or lazy susans |
| Only floor space | Add stackable plastic drawers or labeled milk crates |
Labels = Sanity
Labels help maintain order long-term. Label:
- The front of every bin or basket
- Spray bottles (if you’ve transferred liquids to new containers)
- Shelves by category (e.g., “Glass Cleaners,” “Tools,” “Paper Goods”)
Use waterproof labels or a label maker for a clean, uniform look. For shared households, color coding by family member or category can also help.
Step 4: Organize by Zones, Not Just Products

Photo Credit: @imagine.it.done
Think of your utility closet like a mini supply store. Grouping by function rather than just product type makes it easier to find what you need fast.
Example Zones to Create:
| Zone Name | What It Holds |
| Quick Clean Kit | Daily-use sprays, paper towels, cloths, disinfectant wipes |
| Deep Cleaning Zone | Bleach, floor cleaner, gloves, specialty brushes |
| Home Maintenance | Batteries, tools, adhesives, light bulbs |
| Laundry Support | Dryer sheets, lint rollers, fabric refreshers |
| Seasonal/Backstock | Extra supplies or infrequently used items |
Keep the most frequently-used zones at eye level or easy reach. Store seasonal or overflow items higher up or down low.
Step 5: Prioritize Safety, Accessibility & Sustainability
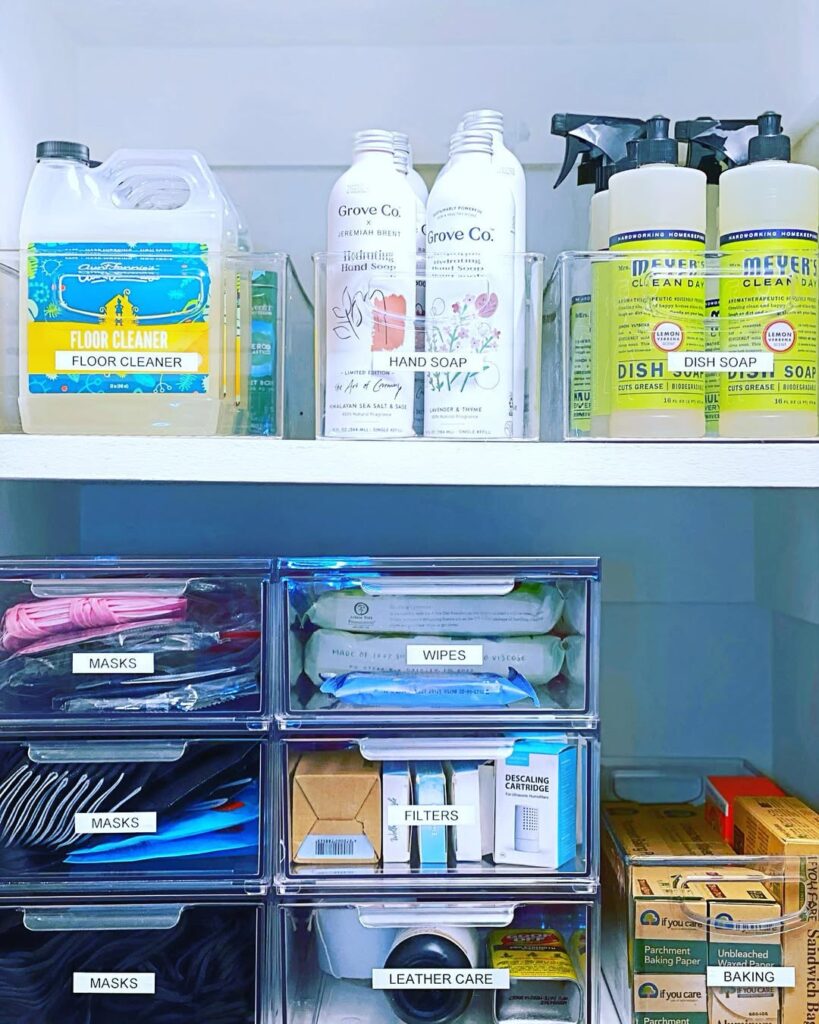
Photo Credit: @csphome
Now that your storage systems are in place and zones are defined, let’s make sure your utility closet isn’t just efficient—but also safe, accessible, and eco-friendly.
Safety First: Store Hazardous Items Wisely
Many utility closets hold products that could be dangerous to kids, pets, or even adults if not stored properly. Here’s how to keep things safe:
- Lockable bins or cabinets: Store bleach, ammonia, pesticides, and other harsh chemicals out of reach and in closed containers.
- Label hazardous items clearly: Use bold text or warning icons.
- Never store chemicals above eye level: In case of a leak or spill, you don’t want these dripping down on you.
- Separate incompatible products: For example, don’t store bleach and ammonia near each other (toxic fumes if they mix!).
Kid- and Pet-Friendly Tweaks
If you share your home with little ones—two-legged or four—keep these in mind:
- Install a childproof latch on the door or inner bins.
- Use top shelves for any risky items, leaving safe ones (like rags or empty bins) lower down.
- Create a “kid-safe zone” if your child helps with chores—mini spray bottles of water, dust cloths, or a hand vacuum can go in a designated bin.
Make It Accessible for Everyone
Whether you’re designing for aging parents, someone with mobility issues, or just want to make cleaning easier for yourself, here are some accessibility tips:
- Use pull-out drawers or slide-out baskets to avoid bending or reaching deep.
- Place frequently-used items between waist and eye level.
- Install lighting: A battery-operated LED light or motion-sensor puck light can be a game changer in a dark closet.
Think Green: Eco-Friendly Organization
Organizing your closet is a great chance to go greener:
- Switch to reusable containers: Glass or BPA-free plastic spray bottles reduce waste.
- Recycle responsibly: Create a zone for recycling batteries, light bulbs, or other household waste.
- Choose non-toxic cleaners: Vinegar, baking soda, and castile soap can handle many tasks without chemicals.
- Upcycle bins or jars: Mason jars or old Tupperware make great small-item containers.
Space-Saving Tips for Small Apartments or Shared Living
If you live in an apartment or share utility space, here’s how to get creative:
| Problem | Creative Fix |
| No utility closet at all | Use an over-the-door organizer in a hallway or bathroom closet |
| Only one shared closet | Assign each person a labeled bin or basket |
| Tiny, narrow utility closet | Use vertical carts, tiered shelves, or hanging organizers |
| Multi-functional space needed | Use cube shelving to divide cleaning from laundry from tools |
Even the tiniest nook can be optimized with a little intention.
Step 6: Maintenance & Long-Term Upkeep
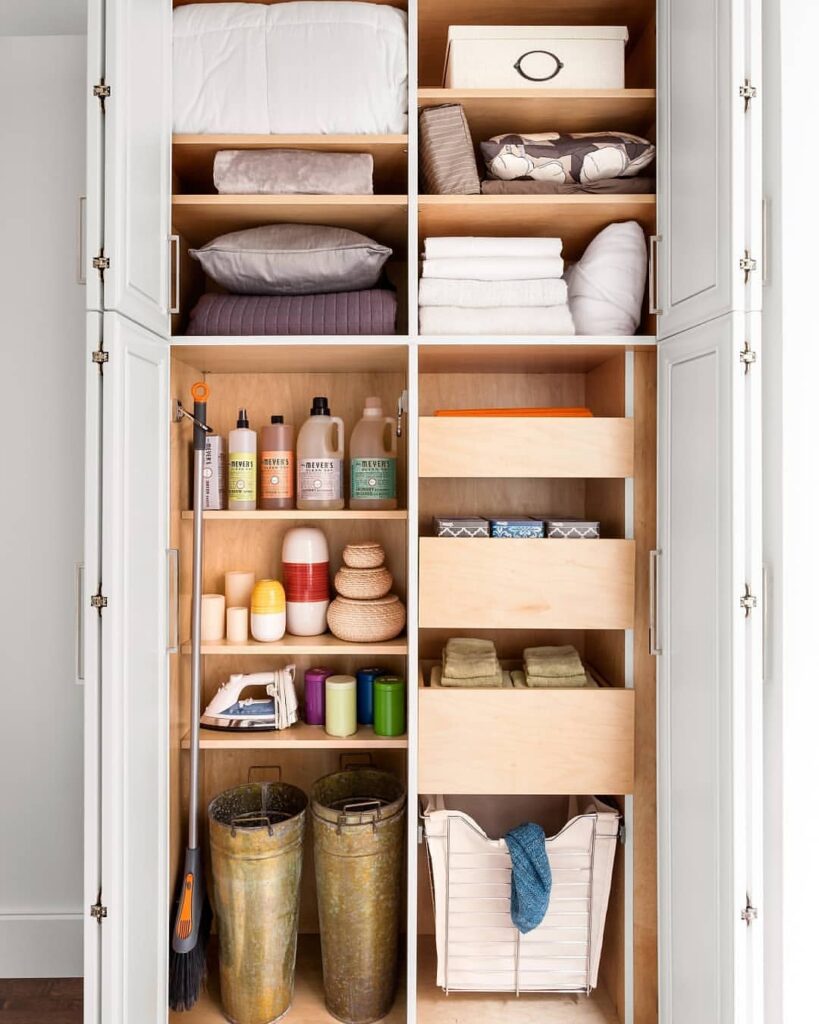
Photo Credit: @transformhome
You’ve done the hard work of organizing—now let’s keep your utility closet tidy for the long haul. Organization isn’t a “one and done” project; it thrives with a bit of regular attention.
Create a Monthly Reset Routine
Set a recurring reminder to do a quick 10–15 minute closet check. During your reset:
- Put items back in their correct zones.
- Check for empty or expired products and discard responsibly.
- Wipe down shelves and bins to prevent grime buildup.
- Refill cleaning supplies so you’re never caught without them.
This monthly habit prevents clutter from creeping back in.
Teach Everyone to Use the System
Your organization system should work for everyone in your home. Here’s how to make that happen:
- Label clearly: The more obvious it is where things go, the more likely people are to put them back.
- Do a quick walkthrough with housemates, kids, or partners.
- Assign responsibilities if you’re sharing the space—e.g., “You refill the paper towels, I handle vacuum filters.”
When everyone’s on board, maintenance becomes effortless.
Update as Your Needs Change
Your storage needs will evolve over time. Stay flexible:
- New pet? Add a zone for their supplies.
- Switched to eco-friendly products? Repurpose extra chemical bins.
- Moved into a new place? Your system may need to shrink or expand.
Don’t be afraid to tweak your layout as life shifts—organization should support your current lifestyle, not a past version of it.
Use Overlooked Hacks That Actually Work
Some organizing hacks are overhyped, but these underrated ones can make a real difference:
- Lazy Susans for corners: Especially helpful for spray bottles or small tools.
- Command hooks on the inside of the door: Great for hanging gloves, brushes, or dusters.
- Color-coding: Assign a color to each category (blue for laundry, green for cleaning).
- QR code labels: Scan to reveal a full list of what’s inside each bin—great for deep storage or infrequently used supplies.
These simple additions streamline your system and make it easier to stick to.
Step 7: Add Finishing Touches for Style and Functionality
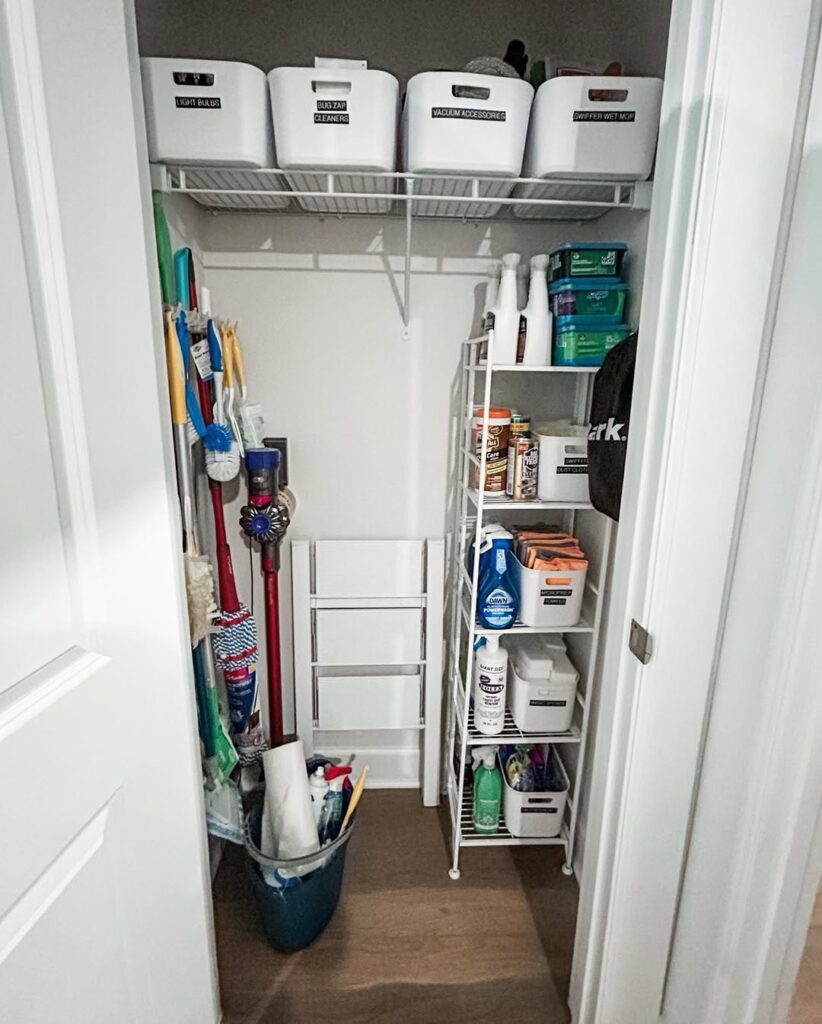
Photo Credit: @closetenvy_va
A utility closet doesn’t have to be all business. A little style goes a long way in making the space feel intentional—and more enjoyable to use.
Incorporate a Bit of Style
Even the most functional storage area can look polished with a few thoughtful choices:
- Choose bins in a cohesive color scheme (neutrals, soft pastels, or bold tones that suit your home).
- Use uniform containers for a cleaner, streamlined look.
- Add peel-and-stick wallpaper or a pop of paint on the back wall to define the space.
- Swap wire shelves for wood or acrylic, if your budget allows—it elevates the whole vibe.
A styled closet subtly reinforces the habit of keeping it tidy.
Make It Work for YOU
Not every hack or system fits everyone’s lifestyle. Personalization is key:
- Love lists? Hang a small dry erase board inside for tracking supply levels.
- Always in a rush? Mount a clipboard with a restock checklist.
- Hate visual clutter? Stick with opaque bins and subtle labels.
There’s no “right” way—just the right way for you.
Downloadable Utility Closet Checklist
Here’s a printable checklist you can reference as you go:
[ ] Empty the entire closet
[ ] Sort items into categories
[ ] Declutter what you don’t need
[ ] Group items into zones
[ ] Choose containers and install organizers
[ ] Label everything clearly
[ ] Set a monthly reset reminder
[ ] Train your household on the new system
[ ] Add finishing touches (color, bins, wallpaper, etc.)
Tip: Laminate it and hang it inside your closet for easy maintenance.
Quick Recap: How to Organize a Utility Closet Like a Pro
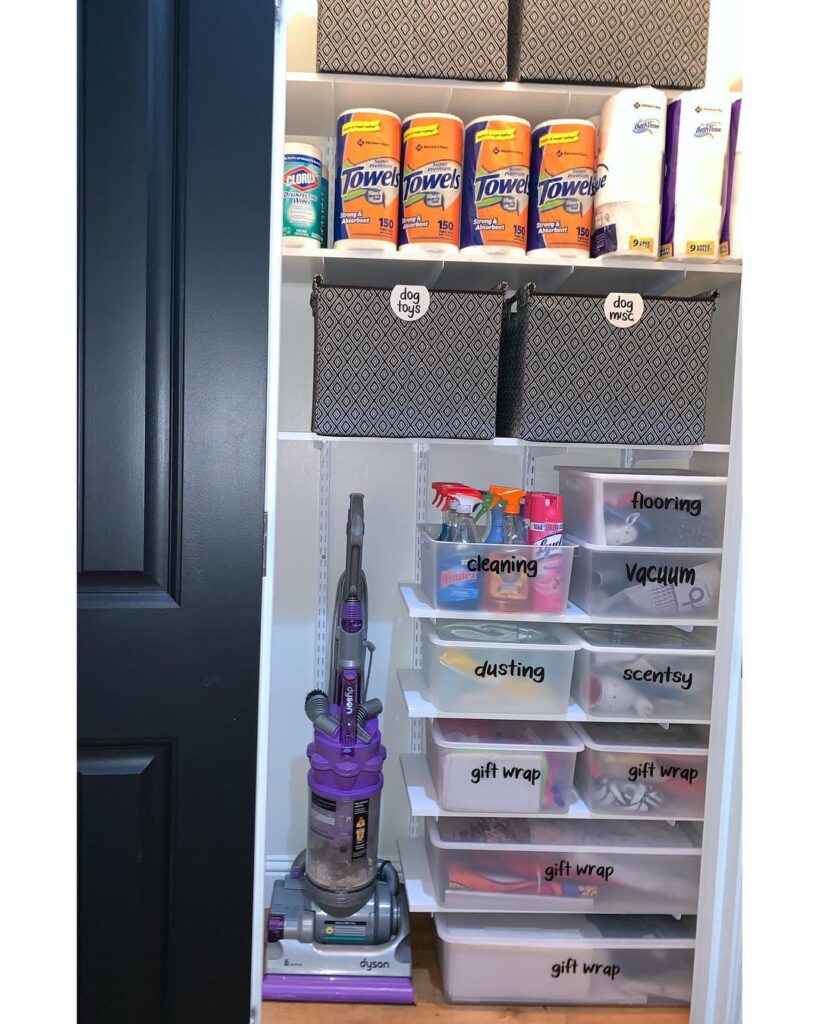
Photo Credit: @imaudreysherman
- Step 1: Take everything out and sort by category
- Step 2: Declutter what you don’t use
- Step 3: Assign zones for different types of supplies
- Step 4: Choose smart storage solutions and install organizers
- Step 5: Label everything (clearly!)
- Step 6: Set up a monthly maintenance routine
- Step 7: Personalize with style and finishing touches
Organizing your utility closet may take an afternoon, but the payoff is long-term peace of mind and better flow in your home. Whether it’s laundry, cleaning, or seasonal supplies, a well-organized closet saves you time, energy, and stress.
You’ve got this! Now go make that closet work for you.